Do some people ask how to cut porcelain tile? But before knowing how what is a porcelain tile first? Porcelain tiles, contrary to popular belief, are not synonymous with ceramic tiles. On the other hand, porcelain tiles are a type of ceramic tile that absorbs 0.5 percent of its weight and is frequently used for flooring and walling.
The only distinction between ceramic and porcelain tiles is that ceramic tiles are composed of clay, water, and sand, while porcelain tiles are composed of denser clay. Porcelain tiles are harder and denser than ceramic tiles due to their manufacturing process, which involves heat and pressure.
Both are composed of clay and other natural materials, but porcelain tiles are composed of a purer form of clay. When you use porcelain tiles, you can be more creative with your design.
Due to the distinct color difference, these tiles cannot be replaced in a corner if they become chipped; caution should be used when cutting and installing porcelain tile.
The Six Most Effective Techniques On How To Cut Porcelain Tile
Cut a porcelain tile with a variety of tools, from a simple tile nipper to a more expensive tile cutter. Due to the unique nature of each tool’s method, it must be completed under proper supervision.
These alternatives to the wet saw are more convenient, faster, and simpler to execute. Additionally, they are less expensive.
Although a wet tile saw is the best tool for cutting porcelain tile, it is typically reserved for difficult jobs rather than the routine household or petty jobs we perform.
The following tools are frequently used to cut porcelain tile:
1. Tile Nipper
Cutting arcs or circular sections of tiles with a wet tile saw is difficult. Tile nippers are ideal for this. Additionally, they can be used to cut regular shapes.
Numerous individuals in the construction industry rely heavily on tile nippers. This is because they are so simple to use and the vast majority of us are only interested in cutting a small piece of tile.
The following are the simple steps for using a tile nipper:
- To begin, thoroughly clean and prepare the tile for cutting. Then, score a line along the edge where you want to make a cutter cut.
- While holding the tile nipper at the marked line’s edge, apply pressure with the tile nipper. The nipper will dislodge the piece.
- Take small nips and proceed slowly, as the piece may not nip completely off, in which case you should use a cutter.
- Avoid overworking your nipper to the point of incapacitation.
- After you’ve finished nipping, smooth the edges and cut with a rub brick. Proceed cautiously, as the edges will be razor-sharp.
- Qep and Kobalt are currently the best tile nippers on the market.
Tile nippers, in my opinion, should be reserved for cutting curvy and circular areas. Use a wet tile saw to make straight and angled cuts. Additionally, using a new generation tile nipper with replaceable teeth is a good idea today.
Due to the increased hardness of modern porcelain tiles, older ones may break.
2. Angle Grinder
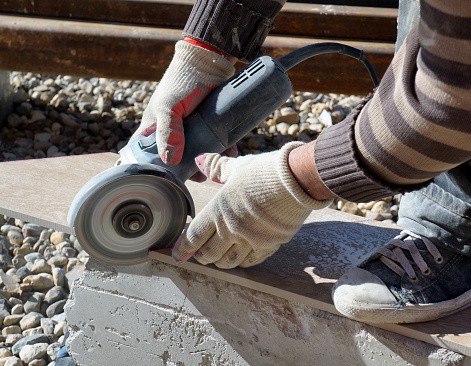
The angle grinder is the second best tool to use because it is capable of making a variety of cuts in a variety of sizes and shapes, including L cuts, circle cuts, straight cuts, and square cuts. Instead of drilling holes in the porcelain tiles surrounding the toilet, a curvy cut is required to expose the pipes and waste.
It’s simple to cut curves in tiles with an angle grinder.
- Make a rough outline of the shape that will be cut on the tile, noting which side will be wasted. It’s all too easy to lose track of the game and score on the wrong side of the tile. Use an electrician’s tape to create across to serve as a marker.
- On both sides of the tile, draw the desired shape. To obtain a clean, non-chip mark, use light pressure to follow the shape on the angle grinder’s edge.
- Make a series of small cuts along the backside of the tile. These will aid in your control and avoid jamming. Dispose of the blade in the trash can.
- After you’ve made the desired cut, use an abrasive wheel to smooth the edge. The finished cut will be determined by the degree of visibility of the cut (polished/unpolished) on the porcelain tile.
Simply drag the grinder across the edge you wish to cut, and the grinder will quickly and cleanly complete the task.
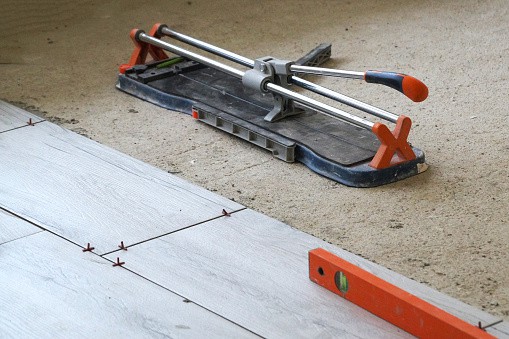
3. Tile Cutter
A tile cutter is used to shape and size ceramic tiles. Certain porcelain tiles can, however, be cut with a standard manual tile cutter, depending on their texture. It is a woodworker’s favorite because it is the quickest of all cutting tools and allows you to customize the type of cuts you make based on the tile type and size.
Simply use a paper cutter to cut the tile like paper and then rub the edge with sandstone to achieve a smoother finish.
The following are the steps for using a tile cutter:
- Adjust and secure the tile cutter’s guide to the beginning.
- Place the cutter on the edge of the tile and slide it into the marked good position.
- Begin sliding the tile cutter across the marked tile by pressing down on it.
- When the vehicle comes to a complete stop, depress the brake pedal.
- It will splinter into two evenly sized fragments. Smoothing the edges reduces their sharpness.
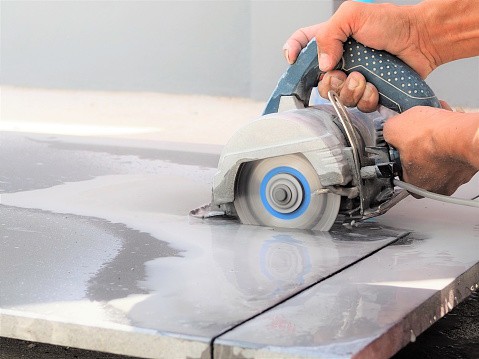
4. Wet Saw
Cutting ceramic and porcelain tiles with a wet tile saw results in a clean, smooth edge. As previously stated, owning a wet saw is not financially viable.
However, you may be forced to weigh the benefits and drawbacks of cutting a porcelain tile with a wet saw. To my mind, this is the optimal way to cut a porcelain tile.
While they have the potential to chip the surface of porcelain tiles, a wet saw equipped with an adjustable blade will provide a cleaner cut. It is always advantageous to work slowly and with a new blade.
Avoid Chips by Notching the Tile
To avoid chipping, it’s a good idea to notch porcelain tiles before cutting them through. To accomplish this, follow these steps:
- Contrast the tile saw blade with the tile.
- Make a mark in the area where the notch will be.
- Turn on the saw and position the tile so that the marking faces the blade, but do not touch them yet.
- Cut an inch (up to two inches) for small tiles and turn it off by pressing the tile against the blade.
- Flip the tile over and activate the saw to cut the notch you previously created.
This is why it is necessary to use a wet saw, a cutting machine, or a blade when cutting a porcelain tile.
- To ensure clean cuts, always cut slowly and with a sharpened blade.
- Before you begin cutting porcelain tile, mark the cutting line with a wax pencil. This ensures size accuracy, and by masking the edges with the appropriate tape, chipping is avoided.
- Fill the reservoir halfway with water, then place the tile above or below the blade’s cutting point.
- Adjust your saw so that it can cut through the tile up to an eighth of an inch. You do not want to cut through the tile or penetrate more than halfway through.
- After you’ve marked the edges, score the line and make clean cuts with a cutter. To avoid distortions or bends, ensure that the tile is leveled along the blade. To snap the tile, apply pressure to it and score it toward the bottom. You can proceed directly to the final cut or notch the tile first.
5. Wet Wheel
A wet wheel, alternatively referred to as a diamond blade, is used to cut through extremely tough and coarse materials. This action is aided by the diamond-studded blade’s edge.
To cut a porcelain tile with a wet wheel, follow these steps:
- Tiles and stones are typically cut using one of two types of wet machines: a tile saw or a wet wheel.
- In one, the overhanging blade travels along the tile’s surface; in the other, the tile travels along the cutting blade (rotating).
- Before cutting the tile, check for side support. In the absence of this, plywood can be used to support tiles with side lengths greater than 600mm.
- Align the edge with the cutting wheel and smoothly guide it across the blade until the cut is complete. If you apply too much force, you risk chipping.
6. Drill Bit
When working with circular cross-sections, drill bits come in handy because they enable you to create clean holes that allow screws to fit properly inside. They come in a variety of sizes and shapes and are compatible with a wide variety of materials.
Drilling holes is similar to cutting porcelain tiles, but on a smaller scale and with circular shapes. Drilling, on the other hand, is difficult, and a cleanly drilled hole in the tile is necessary for accommodating screws, plumbing pipes, and radiator space, among other things.
This can be accomplished quickly and affordably with the assistance of a drill bit. This technique applies to both small and large diameter holes. The following is a step-by-step guide to using a drill bit:
- Make a note of the precise location of the hole to be drilled and wrap it in thick tape to prevent chips and facilitate smooth drilling.
If you wish to drill larger holes, you may require a starting drill hole to act as support.
- To avoid torque caused by sudden shifts in the tile, ensure that it is properly fixed before installation.
- Drill slowly at first to avoid overheating and sticking the hole.
Final Thoughts
Porcelain tiles are becoming more and more popular as they offer a wide range of benefits. Though they are tough, they can be cut with the right tools and technique. Be sure to take all the necessary safety precautions while working with any of the tools mentioned above. Do you have any tips on how to cut porcelain tile?
Related Posts: